
Picture this: you're at a live concert, and the sound is just perfect. The bass is deep and powerful, the treble is crisp and clear, and every instrument seems to have its own space in the mix. That's the magic of equalization at work.
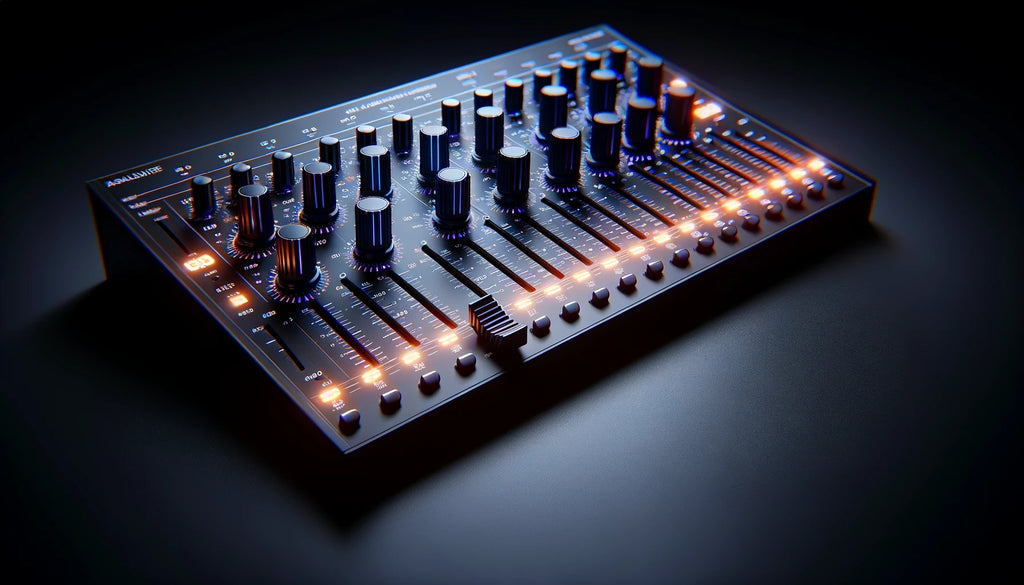
An equalizer, or EQ for short, is a powerful tool that allows you to shape the frequency balance of your audio. It works by dividing the audible frequency range into multiple bands, giving you control over the volume of each band. By adjusting these bands, you can emphasize or de-emphasize certain frequencies, tailoring the sound to your preferences or compensating for the limitations of your audio setup.
The Frequency Spectrum: A Colorful Palette of Sound
To master the art of equalization, it's essential to understand the role of different frequency bands. Let's break it down:
- Sub-bass (20-60 Hz): These low frequencies provide the deep, rumbling sensation you feel in your chest. They're crucial for genres like hip-hop and electronic dance music.
- Bass (60-250 Hz): The foundation of most music, bass frequencies give your audio warmth and body. Too much bass can lead to a muddy sound, while too little can make the music feel thin and lifeless.
- Midrange (250-4,000 Hz): This is where the magic happens. The midrange is home to most musical instruments and vocals, making it the heart and soul of your audio. A well-balanced midrange ensures clarity and definition.
- Treble (4,000-20,000 Hz): The upper frequencies add brightness, air, and sparkle to your music. They're essential for capturing the subtle nuances of instruments like cymbals and strings. However, too much treble can lead to a harsh, fatiguing sound.
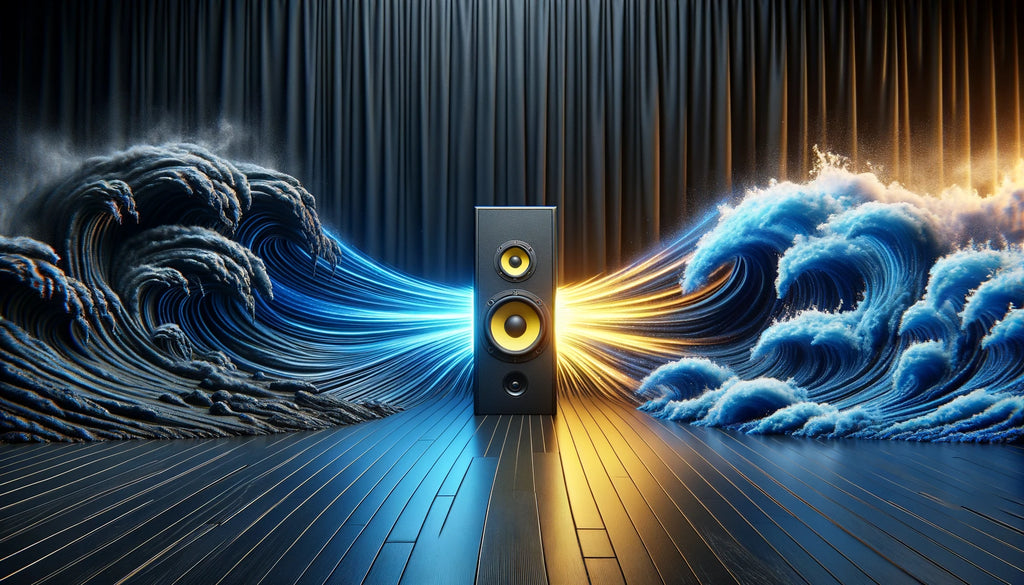
The Power of Bass and Treble: Shaping Your Listening Experience

Now that we've covered the basics of frequency bands, let's zoom in on the two most crucial players: bass and treble.
Bass frequencies are the foundation upon which the rest of your music is built. They provide the rhythmic drive and emotional impact that make your favorite tracks come alive. A well-balanced bass response can make the difference between a lackluster listening experience and one that keeps you engaged from start to finish.
On the other hand, treble frequencies are responsible for the clarity, detail, and perceived "openness" of your audio. They help you pick out individual instruments and vocals, creating a sense of space and depth. Without adequate treble, your music may sound muffled and dull.
The Art of Personal Preference
Here's the thing: there's no one-size-fits-all approach to equalizer settings. What sounds perfect to my ears might be too bass-heavy or treble-intensive for you. That's where personal preference comes into play.
Your ideal bass and treble settings will depend on factors like your music taste, listening environment, and audio setup. Some people prefer a warm, bass-focused sound, while others crave the sparkle and air of emphasized treble. The key is to experiment and find the balance that resonates with you.
In my years as a professional musician and audio technician, I've learned that the best equalizer settings are the ones that make you feel most connected to your music. Don't be afraid to tweak and adjust until you find your sweet spot.
Optimizing Bass Settings

Finding Your Bass Sweet Spot
Bass is the heart and soul of many music genres, from hip-hop to electronic dance music. But finding the right amount of bass for your audio setup can be a challenge. Too much bass can overpower other frequencies, leading to a muddy, distorted sound. Too little bass, on the other hand, can leave your music feeling thin and lifeless.
Several factors influence bass response, including:
- Headphone type: Over-ear headphones typically offer more bass depth than in-ear or on-ear models, thanks to their larger drivers and improved seal around your ears.
- Music genre: Some genres, like hip-hop and EDM, rely heavily on deep, powerful bass. Others, like classical and jazz, prioritize a more balanced, natural sound.
- Listening environment: The acoustics of your room can greatly impact bass response. Hard surfaces like walls and floors can reflect low frequencies, leading to a boomy, exaggerated bass.
To find your bass sweet spot, start by setting your equalizer to a flat or neutral position. Then, gradually increase the bass frequencies until you reach a point where the bass sounds full and impactful without overpowering other elements of the music. Pay attention to the clarity of vocals and instruments in the midrange, and make sure the bass doesn't cause distortion or muddiness.
Precision Bass Control with Parametric EQ
If you really want to dive deep into bass optimization, consider using a parametric equalizer. Unlike graphic equalizers, which divide the frequency spectrum into fixed bands, parametric EQs allow you to target specific frequencies with surgical precision.
With a parametric EQ, you can:
- Adjust the center frequency: Pinpoint the exact bass frequency you want to boost or cut, whether it's the sub-bass rumble at 50 Hz or the upper bass punch at 200 Hz.
- Control the bandwidth (Q factor): Determine how wide or narrow the affected frequency range is. A narrow Q factor will impact a small range of frequencies around the center, while a wide Q factor will affect a broader range.
- Boost or cut the level: Increase or decrease the volume of the selected frequency range to taste.
By using a parametric EQ to target specific bass frequencies, you can fine-tune your sound with unparalleled control and precision. It's a powerful tool for shaping your bass response to perfectly suit your preferences and audio setup.
Avoiding Bass Pitfalls
While it's tempting to crank up the bass for maximum impact, there are a few pitfalls to watch out for:
- Bass distortion: Pushing your bass frequencies too hard can cause distortion, especially if your headphones or speakers aren't designed to handle heavy low-end. If you hear crackling, popping, or a "blown-out" sound, you've gone too far.
- Muddiness: Overdoing the bass can also lead to a muddy, congested sound that obscures other frequencies. This is especially common in the lower midrange, where bass frequencies can bleed into and overpower vocals and instruments.
- Midrange masking: Excessive bass can also mask or "cover up" important elements in the midrange, like vocals and lead instruments. To maintain clarity, make sure your bass boost doesn't come at the expense of midrange definition.
To avoid these issues, always make bass adjustments in the context of the full frequency spectrum. After boosting the bass, take a moment to listen critically to the midrange and treble frequencies. If you notice any muddiness, distortion, or loss of clarity, dial back the bass until you find a balanced, cohesive sound.
Fine-Tuning Treble Settings

The Role of Treble in Audio Quality
While bass may be the foundation of your music, treble is the key to unlocking its full potential. The treble range, which covers frequencies from around 4,000 Hz to 20,000 Hz, is responsible for the clarity, detail, and perceived "openness" of your audio.
Here's how treble frequencies contribute to your listening experience:
- Clarity and definition: Treble frequencies help you pick out individual instruments and vocals, making it easier to follow the intricacies of your favorite tracks. Without adequate treble, your music may sound muffled or congested.
- Soundstage and imaging: Higher frequencies also play a crucial role in creating a sense of space and depth in your audio. They help you perceive the position and distance of different elements in the mix, from the placement of instruments to the reverb of a concert hall.
- Brightness and air: Treble frequencies add a sense of brightness and airiness to your music, making it feel more open and alive. They're especially important for capturing the subtle nuances of instruments like cymbals, strings, and acoustic guitars.
However, like bass, treble is a double-edged sword. Too much treble can lead to a harsh, fatiguing sound that's uncomfortable to listen to for long periods. It can also exacerbate sibilance (the harsh "s" and "t" sounds in vocals) and make your music sound artificially bright or thin.
Enhancing or Taming High Frequencies
To find the perfect treble balance for your audio setup, you'll need to experiment with different equalization techniques. Here are a few methods to try:
- Shelving filters: A shelving filter is a type of EQ that boosts or cuts all frequencies above or below a certain point. To adjust the overall brightness of your music, try using a high-shelf filter to gently boost or cut the treble frequencies. Start with a small adjustment of 2-3 dB and listen for changes in clarity and airiness.
- Peak filters: If you want to target specific treble frequencies, try using a peak filter. This type of EQ allows you to boost or cut a narrow range of frequencies around a central point. For example, if you want to emphasize the sparkle of cymbals without making the overall sound too bright, you could try boosting a narrow range around 8-10 kHz.
- High-frequency roll-off: Sometimes, the key to a smooth, natural-sounding treble is knowing when to cut rather than boost. If your music sounds harsh or fatiguing, try using a gentle high-frequency roll-off to tame the highest frequencies. A subtle cut of 2-3 dB above 10 kHz can help take the edge off without sacrificing clarity or detail.
Remember, the key to effective treble equalization is subtlety. Small adjustments can make a big difference in the overall tonal balance of your music, so take your time and listen critically as you fine-tune your settings.
Addressing Sibilance and Harshness
One of the most common challenges in treble equalization is dealing with sibilance and harshness. Sibilance refers to the excessive prominence of "s" and "t" sounds in vocals, while harshness describes a grating, abrasive quality in the upper midrange and treble frequencies.
To tame sibilance and harshness, try the following techniques:
- Identify problematic frequencies: Sibilance and harshness often occur in the 6-10 kHz range, with specific problem areas varying depending on the vocalist and recording. Use a parametric EQ with a narrow Q factor to sweep through this range and identify the frequencies that sound most harsh or sibilant.
- Cut rather than boost: Once you've found the problematic frequencies, resist the urge to boost the surrounding areas to compensate. Instead, make a precise cut of 2-4 dB at the offending frequency. This will help tame the sibilance or harshness without affecting the overall clarity of the vocals.
- Use a de-esser: If you're dealing with particularly stubborn sibilance, consider using a de-esser plugin. A de-esser is a specialized type of compressor that targets and reduces the level of sibilant frequencies in real-time. It can be a powerful tool for smoothing out harsh vocals without sacrificing detail or presence.
By carefully addressing sibilance and harshness, you can achieve a smoother, more balanced treble response that enhances the overall listening experience. Just remember to make small, targeted adjustments rather than broad-brush cuts, and always listen critically to ensure you're not inadvertently dulling the clarity or detail of your music.
Balancing Bass and Treble
The Yin and Yang of Audio: Achieving Harmony
In the world of audio, bass and treble are like yin and yang – two opposing forces that, when balanced, create a sense of harmony and completeness. While it's easy to get caught up in the excitement of thundering bass or shimmering treble, the key to a truly satisfying listening experience lies in finding the perfect balance between these two extremes.
Think of your favorite songs. The ones that give you goosebumps, that make you feel like you're right there in the studio with the artist. Chances are, those tracks have a beautifully balanced frequency spectrum, with the bass and treble working together in perfect harmony.
The Art of the EQ Curve
One of the most effective ways to achieve a well-rounded, harmonious sound is by crafting a cohesive, natural-sounding EQ curve. An EQ curve is essentially a visual representation of the balance between different frequency bands, from the deepest sub-bass to the highest treble.
Here are a few techniques for creating a balanced EQ curve:
- Start with a neutral baseline: Before making any drastic adjustments, set your equalizer to a flat or neutral position. This will give you a clear starting point from which to make more targeted tweaks.
- Make small, incremental adjustments: Resist the urge to make large, sweeping changes to your EQ curve. Instead, make small, incremental adjustments of 1-2 dB at a time. This will help you maintain a sense of balance and avoid over-correcting in any one area.
- Use your ears, not your eyes: While it can be tempting to create a visually striking EQ curve, remember that your ears are the ultimate judge of audio quality. Trust what you hear, not what you see on the screen.
- Consider the context: The ideal EQ curve will vary depending on factors like the genre of music, the quality of your audio source, and the characteristics of your headphones or speakers. Take these factors into account when crafting your curve, and don't be afraid to make adjustments on the fly.
By following these guidelines and using your ears as your guide, you can create an EQ curve that strikes the perfect balance between bass and treble, resulting in a cohesive, natural-sounding listening experience.
The Smiley Face: A Starting Point for Balance
One popular starting point for achieving a balanced bass-to-treble ratio is the "smiley face" EQ curve. As the name suggests, this curve resembles a smiley face, with a slight boost in the low and high frequencies and a gentle dip in the midrange.
To create a smiley face curve:
- Start with a flat EQ setting.
- Gently boost the bass frequencies around 60-100 Hz by 2-3 dB.
- Make a similar boost to the treble frequencies around 10-12 kHz.
- If desired, make a small cut of 1-2 dB in the midrange around 1-2 kHz to create space for the bass and treble.
The smiley face curve is a great starting point because it emphasizes the frequencies that are most pleasing to the human ear, while still maintaining a sense of balance and clarity. It's a particularly good choice for genres like pop, rock, and hip-hop, which often benefit from a slightly exaggerated bass and treble response.
Of course, the smiley face is just a starting point – you'll want to adjust the curve to suit your specific needs and preferences. Experiment with different levels of bass and treble boost, and don't be afraid to deviate from the curve if your ears tell you to.
Different Strokes for Different Folks: Genre-Specific EQ
Just as every piece of music is unique, every genre has its own sonic characteristics and EQ requirements. What sounds great for a thumping EDM track might be completely inappropriate for a delicate classical recording.
Here are a few general guidelines for genre-specific EQ:
- Rock: Boost the bass around 60-100 Hz for added punch, and add a slight treble boost around 6-8 kHz for increased presence and clarity. Cut the midrange around 1-2 kHz to create space for the drums and vocals.
- Hip-hop: Emphasize the sub-bass frequencies around 40-60 Hz for a deep, powerful low-end. Boost the treble around 10-12 kHz for added sparkle and clarity, and make a small midrange cut around 500 Hz to create space for the vocals.
- Classical: Keep the EQ as flat and neutral as possible, with minimal boosting or cutting. If needed, make small adjustments to the midrange and treble to enhance the clarity and presence of individual instruments.
- Jazz: Boost the bass around 80-100 Hz for added warmth, and make a small treble boost around 8-10 kHz for increased clarity and air. Keep the midrange relatively flat to preserve the natural timbre of the instruments.
Of course, these are just general guidelines – the ideal EQ settings will vary depending on the specific recording, your audio setup, and your personal preferences. Use these suggestions as a starting point, but always trust your ears and make adjustments as needed.
EQ on the Go: Tailoring Your Sound to Your Surroundings
One of the beautiful things about music is that it's a constant companion, following us wherever we go. But as we move through different environments and situations, the ideal EQ settings for our headphones or speakers can change.
Here are a few tips for tailoring your EQ to different listening situations:
- Noisy environments: If you're listening in a noisy environment like a busy street or a crowded cafe, you may want to boost the midrange and treble frequencies to help the music cut through the background noise. A small boost around 1-2 kHz can help enhance the clarity of vocals and instruments.
- Quiet environments: In quieter environments like a library or a bedroom, you may want to reduce the bass and treble slightly to avoid fatiguing your ears over long listening sessions. A neutral, balanced EQ curve is often the best choice for these situations.
- Open-back headphones: If you're using open-back headphones, which allow more sound to leak in and out, you may want to reduce the bass slightly to avoid disturbing others around you. A small cut around 60-100 Hz can help keep the low-end in check without sacrificing too much impact.
- Closed-back headphones: Closed-back headphones, which provide better isolation from outside noise, often benefit from a slight boost in the treble frequencies to avoid sounding too "closed-in" or muffled. A small boost around 8-10 kHz can help open up the soundstage and add some extra sparkle.
By taking the time to adjust your EQ settings for different listening situations, you can ensure that your music always sounds its best, no matter where you are or what you're doing.
Saving and Sharing Equalizer Presets

Crafting Your Perfect Sound: The Power of Presets
Once you've taken the time to carefully adjust your EQ settings for different genres, environments, and listening situations, the last thing you want to do is lose all that hard work. That's where equalizer presets come in.
Most EQ apps and devices allow you to save your custom settings as presets, which you can recall at any time with just a few taps or clicks. This means you can create the perfect EQ curve for your favorite genres or listening situations, and switch between them effortlessly as your needs change.
Saving EQ Presets: A Step-by-Step Guide
The exact process for saving EQ presets will vary depending on the device or app you're using, but here's a general overview:
- Open your EQ app or settings menu.
- Adjust the EQ bands to your desired settings.
- Look for a "Save" or "Create Preset" option.
- Give your preset a descriptive name, like "Rock" or "Commute."
- Save the preset and exit the menu.
It's a good idea to create a few different presets for your most commonly used genres or listening situations, so you always have a solid starting point for further adjustments.
Organizing Your Presets: Tips and Tricks
As you create more and more EQ presets, it can be easy to lose track of which ones you've made and what they're for. Here are a few tips for keeping your presets organized and easy to find:
- Use descriptive names: Give your presets clear, descriptive names that indicate their purpose, like "Bass Boost" or "Treble Cut." Avoid generic names like "Preset 1" or "EQ 2."
- Group by genre or situation: If your EQ app allows it, try grouping your presets by genre or listening situation. This will make it easier to find the right preset for the right moment.
- Use folders or tags: Some EQ apps allow you to create folders or tags to further organize your presets. Take advantage of these features to keep your presets tidy and easy to navigate.
- Delete unused presets: If you find yourself with a bunch of presets you never use, don't be afraid to delete them. Keeping your preset library lean and focused will make it easier to find the ones you actually need.
By taking a few moments to organize your presets, you can ensure that your perfect sound is always just a few taps away.
Sharing Your Presets: Joining the EQ Community
One of the best things about creating custom EQ presets is the ability to share them with others. Whether you're a professional audio engineer or just a passionate music lover, sharing your presets is a great way to connect with others who share your passion for perfect sound.
Here are a few ways to share your EQ presets:
- Export and share files: Most EQ apps allow you to export your presets as files, which you can then share with others via email, messaging apps, or cloud storage services like Dropbox or Google Drive.
- Use preset sharing platforms: There are a number of online platforms dedicated to sharing EQ presets, like EQAlizer.com and Equalizer APO. These platforms allow you to upload your presets and browse presets created by others, making it easy to discover new sounds and share your own creations with the world.
- Participate in audio forums: Many online audio forums, like Head-Fi and Reddit's r/headphones, have dedicated threads for sharing EQ presets. These communities are a great place to connect with other audio enthusiasts and get feedback on your presets.
When sharing your presets, be sure to include a brief description of what they're intended for and any specific instructions for using them. This will help others get the most out of your hard work and ensure that your presets are being used as intended.
Preset Compatibility: Ensuring a Seamless Experience
One important thing to keep in mind when sharing EQ presets is compatibility. Different EQ apps and devices use different file formats and settings configurations, so it's important to make sure that your presets will work smoothly on the intended platform.
Here are a few tips for ensuring preset compatibility:
- Check the file format: Before sharing a preset, check to see what file format your EQ app uses. Common formats include .txt, .xml, and .eqf. Make sure the person you're sharing with is using an app that can read that format.
- Include device and app information: When sharing a preset, include information about the device and app you used to create it. This will help others understand the context of your preset and make any necessary adjustments for their own setup.
- Test on multiple devices: If possible, test your preset on multiple devices and platforms before sharing it widely. This will help you identify any compatibility issues and make necessary adjustments.
- Use cloud storage for syncing: If you use multiple devices and want to ensure that your presets are always up-to-date, consider using a cloud storage service like iCloud or Google Drive to sync your preset files across devices. This will help you avoid compatibility issues and ensure that you always have access to your favorite sounds.
By taking a few moments to ensure preset compatibility, you can help others enjoy your custom sounds and avoid frustration and confusion.
Troubleshooting Common Equalizer Issues
Even with the most carefully crafted EQ curves, things can sometimes go wrong. One of the most common issues you may encounter when using an equalizer is distortion – a harsh, grating sound that can ruin your listening experience and even damage your equipment.
Here are a few common causes of EQ distortion:
- Clipping: Clipping occurs when the EQ boosts a signal beyond the maximum level that your device can handle, resulting in a harsh, distorted sound. This is often caused by excessive boosting of the bass or treble frequencies.
- Overloading: Overloading happens when the overall volume of your EQ curve is too high, causing your device to struggle to reproduce the sound accurately. This can result in a muddy, distorted sound across all frequencies.
- Incorrect settings: Sometimes, distortion can be caused by incorrect EQ settings, like boosting a frequency band too much or cutting another band too aggressively. This can create an unbalanced, unnatural sound that's prone to distortion.
If you're experiencing distortion when using your equalizer, here are a few steps you can take to diagnose and fix the issue:
- Check your overall volume: Make sure that your device's overall volume is set to a reasonable level. If it's too high, it can cause overloading and distortion.
- Reduce extreme EQ settings: If you've boosted or cut any frequency bands to extreme levels, try reducing those settings to see if it eliminates the distortion. Aim for a more balanced, natural-sounding EQ curve.
- Reset to a flat EQ: If you're not sure which settings are causing the distortion, try resetting your EQ to a flat curve and starting over from scratch. This will help you identify problem areas and make more targeted adjustments.
- Check your equipment: If you're still experiencing distortion after adjusting your EQ settings, there may be an issue with your headphones, speakers, or audio source. Try testing your EQ with different equipment to see if the problem persists.
By following these steps and using your ears as your guide, you can identify and eliminate distortion issues and get back to enjoying your music with crystal-clear sound.
Frequency Imbalances: When Your EQ Sounds "Off"
Another common issue you may encounter when using an equalizer is frequency imbalance – a sense that certain frequency ranges are too prominent or too subdued, resulting in an unnatural or fatiguing sound.
Here are a few signs that your EQ may be suffering from frequency imbalance:
- Muddiness or lack of clarity: If your EQ curve is too heavily weighted towards the bass frequencies, it can result in a muddy, indistinct sound that lacks clarity and definition.
- Harshness or sibilance: If your EQ is too heavily weighted towards the treble frequencies, it can result in a harsh, fatiguing sound with excessive sibilance (a sharp, hissing quality on "s" and "sh" sounds).
- Thin or hollow sound: If your EQ curve is too heavily weighted towards the midrange frequencies, it can result in a thin, hollow sound that lacks warmth and body.
To identify and correct frequency imbalances in your EQ, try the following techniques:
- Use a spectrum analyzer: A spectrum analyzer is a tool that visually represents the levels of different frequency ranges in your audio signal. By comparing your EQ curve to a spectrum analyzer, you can identify areas where certain frequencies may be too prominent or too subdued.
- Compare to reference tracks: Another helpful technique is to compare your EQ curve to a reference track – a professionally mixed and mastered song in a similar genre or style. By comparing the frequency balance of your EQ to the reference track, you can identify areas where your EQ may be out of balance.
- Make small, targeted adjustments: When correcting frequency imbalances, it's important to make small, targeted adjustments rather than broad, sweeping changes. Start by making small boosts or cuts to the problematic frequency ranges, and listen carefully to how they affect the overall sound.
- Take breaks and listen with fresh ears: Ear fatigue is a real thing, and it can make it difficult to accurately judge the frequency balance of your EQ. Take regular breaks and listen with fresh ears to ensure that you're making accurate, objective adjustments.
By using these techniques and trusting your ears, you can identify and correct frequency imbalances in your EQ and achieve a more balanced, natural-sounding listening experience.
Fine-Tuning Your EQ: Tips and Tricks
Even with a well-balanced EQ curve, there's always room for improvement. Here are a few tips and tricks for fine-tuning your equalizer for optimal performance:
- Make small, incremental adjustments: When fine-tuning your EQ, it's important to make small, incremental adjustments rather than large, drastic changes. A little goes a long way when it comes to EQ, and small tweaks can have a big impact on the overall sound.
- Use your ears, not your eyes: While it can be tempting to rely on visual aids like spectrum analyzers and EQ curves, it's important to remember that your ears are the ultimate judge of sound quality. Trust what you hear, not just what you see on the screen.
- Take breaks and listen in different environments: As mentioned earlier, ear fatigue can make it difficult to accurately judge the sound of your EQ. Take regular breaks and listen to your EQ in different environments (e.g. quiet room, noisy street) to get a more well-rounded sense of how it performs.
- Experiment with different genres and styles: Different genres and styles of music have different EQ requirements, so it's important to experiment with a wide range of material when fine-tuning your EQ. Listen to how your EQ performs with everything from bass-heavy hip-hop to delicate classical pieces to get a sense of its versatility.
- Don't be afraid to start over: If you're not happy with how your EQ is sounding, don't be afraid to scrap it and start over from scratch. Sometimes, a fresh start is the best way to achieve the sound you're looking for.
By following these tips and tricks and using your ears as your guide, you can fine-tune your equalizer for optimal performance and achieve the perfect sound for your needs and preferences.
The Golden Rule of EQ: Less is More
As you dive deeper into the world of equalization, it's easy to get carried away with all the possibilities and options at your fingertips. However, it's important to remember that when it comes to EQ, less is often more.
Here are a few reasons why a minimalist approach to EQ is often the best choice:
- Preserving the natural sound: Every piece of music is mixed and mastered with a specific sound in mind. By using EQ too aggressively, you risk altering that sound and losing the original vision of the artist and producers.
- Avoiding ear fatigue: Aggressive EQ curves can be fatiguing to listen to over long periods of time, leading to listener discomfort and even hearing damage in extreme cases.
- Maintaining compatibility: The more complex and aggressive your EQ curve, the less likely it is to sound good on a wide range of systems and devices. By keeping your EQ simple and subtle, you ensure better compatibility and a more consistent listening experience.
So, the next time you're tempted to make a drastic adjustment to your EQ, ask yourself: is this really necessary? Can I achieve the sound I want with a more subtle, targeted approach? By keeping the "less is more" principle in mind, you can achieve better, more natural-sounding results with your equalizer.
FAQ
What should bass and treble be set at?
The ideal bass and treble settings will vary depending on factors like the genre of music, your personal preferences, and the capabilities of your audio setup. As a general rule, aim for a balanced sound with a slight emphasis on the frequencies that are most important for your listening preferences. For example, if you enjoy bass-heavy genres like hip-hop or EDM, you may want to start with a slight boost in the bass frequencies around 60-100 Hz. If you prefer a brighter, more detailed sound, you may want to slightly emphasize the treble frequencies around 8-10 kHz. The key is to make small, incremental adjustments and trust your ears to guide you to the perfect balance.
What is the best EQ setting for bass?
The best EQ setting for bass will depend on the specific track, your audio setup, and your personal preferences. However, a good starting point is to gently boost the frequencies around 60-100 Hz by 2-3 dB. This will emphasize the low-end thump and rumble without overpowering the rest of the mix. If you want to add more punch and definition to the bass, you can also try slightly boosting the low-midrange frequencies around 200-400 Hz. Just be careful not to overdo it, as too much bass boost can lead to a muddy, unclear sound.
Is bass supposed to be higher than treble?
There's no hard and fast rule that says bass should always be higher than treble, or vice versa. The ideal balance between bass and treble will depend on the specific music, your personal preferences, and the capabilities of your audio setup. In general, aim for a balanced sound with a slight emphasis on the frequencies that are most important for the genre and style of music you're listening to. For example, bass-heavy genres like hip-hop and EDM may benefit from a slightly stronger bass presence, while genres like classical and jazz may sound better with a more neutral balance between bass and treble.
Should treble always be higher than bass?
As with the previous question, there's no one-size-fits-all answer to whether treble should always be higher than bass. It all depends on the specific music, your personal preferences, and the capabilities of your audio setup. In some cases, slightly emphasizing the treble frequencies can add clarity, detail, and airiness to the sound. However, too much treble boost can lead to a harsh, fatiguing sound that's uncomfortable to listen to over long periods of time. As a general rule, aim for a balanced sound with a slight emphasis on the frequencies that are most important for the genre and style of music you're listening to.
Does treble make bass louder?
Treble and bass are separate frequency ranges, so boosting the treble won't directly make the bass louder. However, the relative balance between bass and treble can affect how we perceive the overall sound. For example, if the treble is too prominent relative to the bass, it can make the bass seem quieter or less impactful by comparison. Conversely, if the bass is too overpowering, it can make the treble seem dull or muffled. The key is to find a balance between bass and treble that allows both frequency ranges to shine without overpowering each other.
Is high treble bad for speakers?
Excessively high treble levels can potentially damage speakers over time, particularly if the speakers are pushed beyond their maximum volume or if the treble boost is extreme. When speakers are forced to reproduce high-frequency sounds at high volumes, it can cause the speaker drivers to work harder and potentially overheat or wear out more quickly. Additionally, excessive treble levels can cause listener fatigue and discomfort, as the human ear is particularly sensitive to high-frequency sounds. To protect your speakers and your ears, it's best to avoid excessive treble boost and keep your overall listening volume at a moderate level.
What frequency gives deep bass?
The frequency range that produces deep, powerful bass is typically considered to be around 20-200 Hz. This range encompasses the sub-bass frequencies (20-60 Hz) that provide the physical sensation of bass, as well as the lower end of the bass frequencies (60-200 Hz) that provide the tonal character and definition of the bass. To emphasize deep bass, try gently boosting the frequencies around 60-100 Hz with a parametric EQ or low-shelf filter. Just be careful not to overdo it, as excessive bass boost can lead to a muddy, overpowering low-end that detracts from the overall clarity and balance of the mix.
Conclusion
In conclusion, mastering the art of equalizer settings for bass and treble is a crucial skill for any music lover or audio enthusiast. By understanding the basics of frequency balance, learning how to optimize bass and treble settings, and using the right tools and techniques to fine-tune your sound, you can unlock the full potential of your audio setup and enjoy a more immersive, emotionally engaging listening experience.
Throughout this article, we've covered a wide range of topics related to EQ settings for bass and treble, from the fundamentals of how EQ works to advanced techniques for crafting custom presets and troubleshooting common issues. We've also explored the importance of finding the right balance between technical knowledge and creative intuition, and the benefits of adopting a minimalist approach to EQ that prioritizes subtlety and nuance over aggressive, heavy-handed adjustments.
Whether you're a seasoned audiophile or a casual listener just starting to explore the world of audio optimization, I hope this article has provided you with valuable insights and practical tips for getting the most out of your music. By experimenting with different EQ settings, trusting your ears, and staying open to new ideas and approaches, you can develop a deeper appreciation for the art and science of sound and discover new layers of depth and detail in your favorite tracks.
So go forth and EQ with confidence, my fellow audio lovers! With a little practice, patience, and persistence, you'll be crafting custom presets and basking in the glory of perfectly balanced bass and treble in no time. Happy equalizing!


